Creating Custom Nodes
Custom nodes allow you to extend Flyde's building blocks with your own logic.
Use-cases can vary from control flow utilities, and up to business logic wrappers that expose your existing code-base in a modular, and visual way.
Custom nodes can be built in 3 ways:
- Code nodes - the simplest building block of Flyde. It declares its inputs and outputs, and runs some logic when it is executed.
- Visual nodes - a group of nodes that are grouped together visually, and can be reused as a single node.
- Macro nodes - macro nodes are like code nodes but with "edit-time" configuration. The runtime logic and visual representation of a macro node can be different depending on the configuration. The UI for editing the configuration of a macro node is also customizable. Some of the standard library nodes are implemented as macro nodes. For example, the "Conditional" node is a Macro Node that loads a custom UI, which is defined and loaded externally from Flyde's core.
Custom Code Nodes
A Flyde custom code node can be created by exporting an object that implements the CodeNode interface from a TypeScript/JavaScript file ending with .flyde.ts or .flyde.js. This convention helps the visual editor suggest your custom node when exploring the nodes library.
A custom code node consists of 2 parts:
- Its metadata, which is used to describe the node in the visual editor. This includes the node's name, description, inputs, outputs, and icon.
- Its logic, which is the code that runs when the node is executed.
The following example shows how to create a custom code node that adds two numbers together:
import { CodeNode } from "@flyde/core";

export const Add: CodeNode = {
  id: "Add",
  description: "Emits the sum of two numbers",
  inputs: {
    n1: { description: "First number to add" },
    n2: { description: "Second number to add" },
  },
  outputs: { sum: { description: "The sum of n1 and n2" } },
  run: ({ n1, n2 }, { sum }) => sum.next(n1 + n2),
};
The first argument of the run function is an object containing the values of the inputs of the node when it is being executed. The second argument is an object containing the outputs of the node, as RxJS Subjects. The run function can emit values to the outputs of the node by calling next on the corresponding Subject.
Flyde use of RxJS is very simplistic and should be treated as a mere implementation detail. You don't need to know RxJS to create custom nodes. Neither should you rely on a full RxJS API being available in your custom nodes.
The run function also accepts a third argument, which is an object containing advanced utilities to help author more complex custom nodes. One of these utilities is the state object, which gives the node access to state that will be available to it while the flow is running. The state object is Map<string, any>.
For example, the following custom node will emit the average of all the numbers it received since the flow started:
import { CodeNode } from "@flyde/core";

export const Average: CodeNode = {
  id: "Average",
  description: "Emits the average of all the numbers it received",
  inputs: { n: { description: "Number to add to the average" } },
  outputs: { average: { description: "The average of all the numbers" } },
  run: ({ n }, { average }, { state }) => {
    const numbers = state.get("numbers") ?? [];
    numbers.push(n);
    state.set("numbers", numbers);
    average.next(numbers.reduce((a, b) => a + b, 0) / numbers.length);
  },
};
For more examples, please see how the standard library implemented. You can view it here on GitHub: flyde/stdlib.
Custom Visual Nodes
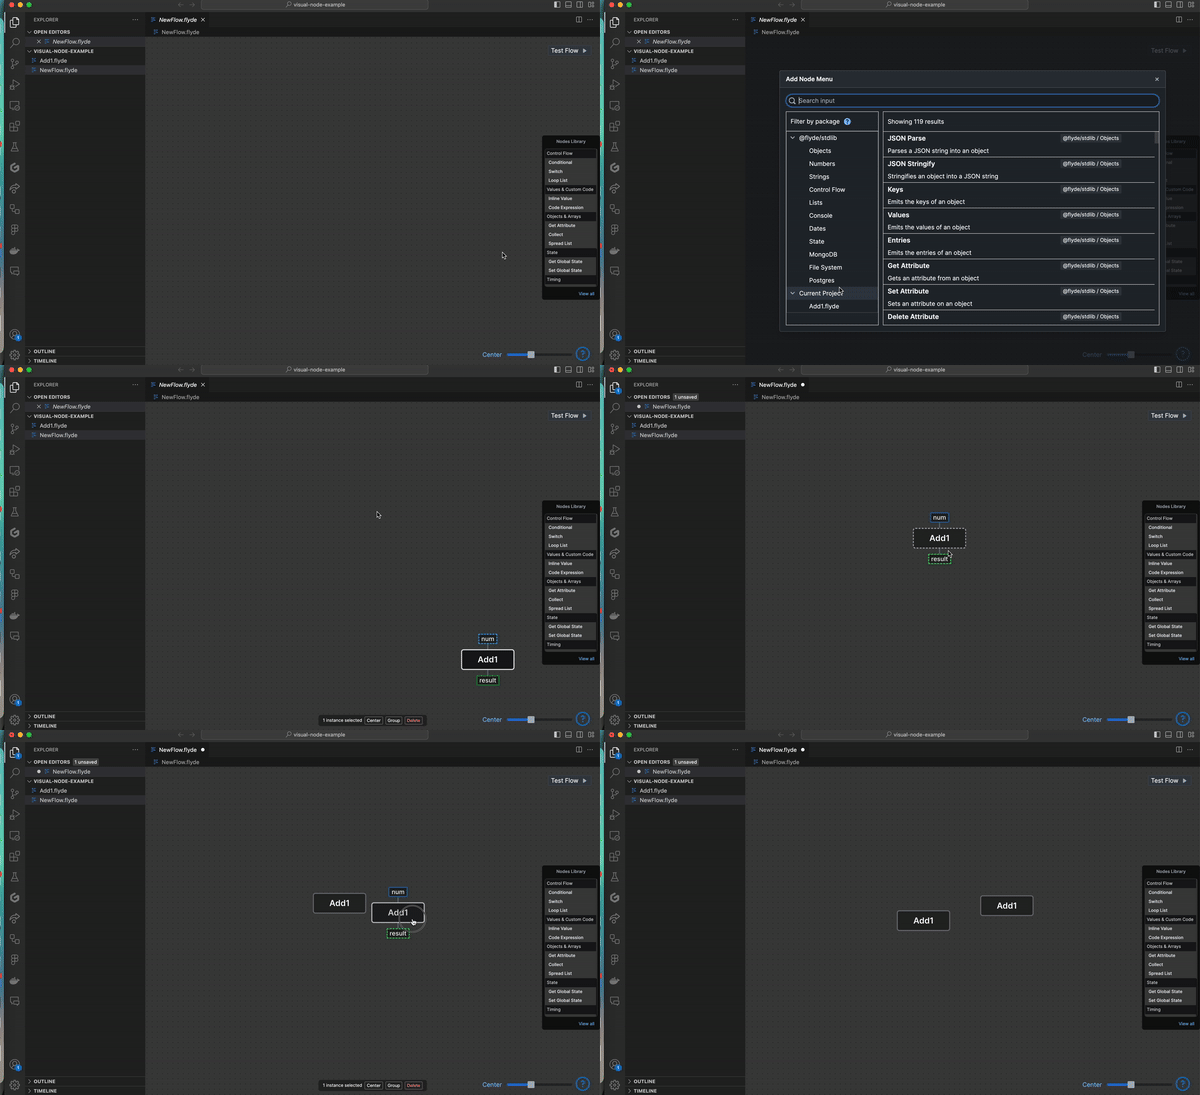
In Flyde, every Flow is also a visual node, this means you can import and use other flows as nodes in your flow.
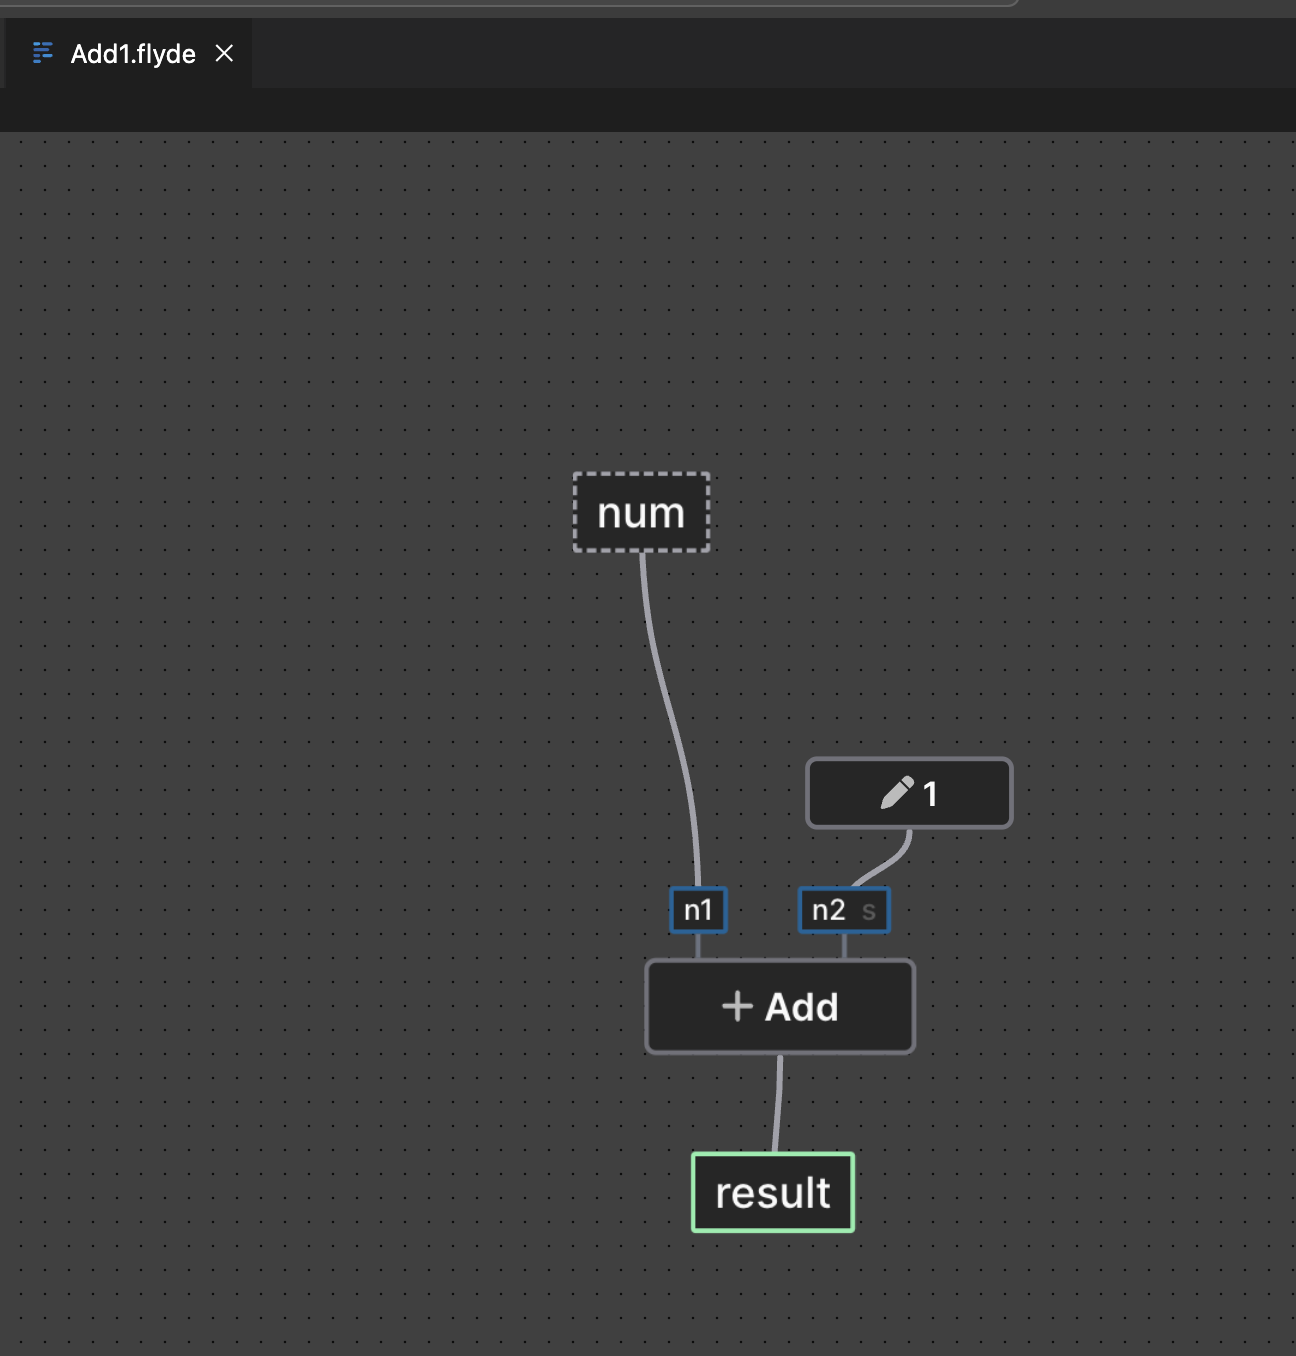
For example, if you create a flow with 1 input and 1 output, which adds 1 to the input, as following:

It will appear on the "Current project" section of the "nodes library -> view all" modal:

Macro Nodes
Macro node docs are still in progress. Please refer to the flyde/stdlib for examples.
Each macro node is expected to expose an already bundled React component that can render and edit the node's configuration.
Each component is expected to be bundled separately, and export a window variable named __MacroNode__ID, which is the ID of the macro node.
Until this is properly documented, and potentially abstracted, you may follow the stdlib's bundle config to see how it is done there - https://github.com/flydelabs/flyde/blob/main/stdlib/package.json#L52.